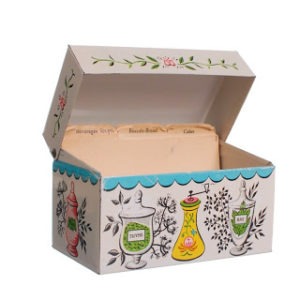
Growing up, I was always fascinated by mom’s little recipe box. Despite the fact that she had a bookcase full of cookbooks (which probably explains my own cookbook-hoarding tendencies), the dishes she cooked most frequently came from recipes she had accumulated from a hodgepodge of sources over the years. Each newly acquired recipe – as well as the recipe’s source – was carefully transcribed onto an index card and placed inside that special box, and every Sunday, my mom would sit down with her grocery list and her personal treasure trove of recipes to plan out our meals for the week. That recipe box might have been unremarkable in appearance, but I knew that it held the secrets to all of the delicious foods my mom would prepare.
 When I made my personal entry into the world of cooking, I began to amass my own assortment of favorite recipes. But instead of being housed in a cute little box, my recipe collection resided in the bookmarks toolbar of my laptop. Much to the chagrin of my
 paranoid careful and conscientious husband, I got into the habit of propping my computer on the kitchen counter so that I could follow a recipe while I cooked. It soon became apparent that I needed a more convenient and less tech-dependent way of storing my recipes, but the prospect of copying every recipe from my computer screen to an index card seemed daunting.
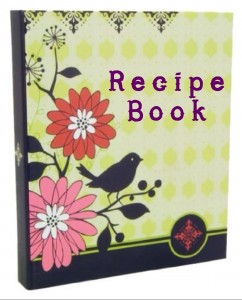
After months of procrastination, I came to the realization that even though a recipe box was what had always worked for my mom, it might not be the best solution for me. Instead of a recipe box, I decided that I would have a recipe book. This would save me the step of having to write out all of my recipes because I could simply print them off my computer. If I acquired a recipe from a source other than the internet, or if I came up with a repeat-worthy recipe of my own, I could type that recipe up and print it out as well. It was the perfect solution!
I’ve had my customized recipe book for over three years now, and I couldn’t be happier with it! If you need a way of consolidating an unwieldy assortment of recipes, I highly recommend making a customized recipe book of your own!
Here’s What You will Need:
- 2″ Binder (or larger if you have a lot of recipes)
- Tab Insertable Plastic Dividers (# will vary depending on how many recipe categories you have)
- Plastic Sheet Protectors (enough to hold all of your recipes plus more for the future – now that you have a place to consolidate your recipes, expect your collection to grow!)
- Printed Copies of Your Favorite Recipes
(Optional) Step 1: If you have view binder, create a cute cover for your recipe book.
This can be as simple or as elaborate as you would like it to be. If you’re a scrapbooker, this is your chance to shine! Or, you can skip this step altogether by choosing a non-view binder. There are many attractive options that will look right at home next to the other cookbooks on your bookshelf.
Step 2: Brainstorm categories for your recipes.
This step will require you to think about the types of recipes in your collection. For instance, if you have a lot of recipes for baked goods, you might need separate categories for breads, cookies, cakes, etc., whereas, if you are not much of a baker, a single category for baked goods will suffice. Also consider the way you search for a recipe: when looking for a recipe to cook for dinner, will it be convenient for you to search by main ingredient (chicken, beef, vegetarian), cooking method (oven, stovetop, slow cooker), or dish type (stew, casserole, meat entree)? These categories will be different for every cook, but to get you started, here are the categories I used when making my recipe book: Appetizers, Beverages, Breakfast, Soups and Stews, Beef Entrees, Chicken Entrees, Vegetarian Entrees, Other Meat Entrees, Vegetable Sides, Other Sides, Baked Goods, Desserts, Miscellaneous.
NOTE: I have found that having more specific categories makes it easier to find what I’m looking for. You could eliminate the need for numerous categories by adding an index to your recipe book, though you would have to update your index regularly to accommodate new additions.
Step 3: Create a divider for each recipe category.
This step is pretty straightforward. Write the name of each recipe category on the tab of a plastic divider, then add the dividers to your binder in an order that makes the most sense to you.
Step 4: Place each recipe in a plastic sheet protector.
I suppose this step isn’t really necessary, as you could simply hole punch each recipe before placing it in your binder. However, the sheet protectors can serve to protect your pages from inevitable food splatters that occur when cooking from a printed recipe. (They say the sign of a good cookbook is that it is covered in food stains. While this may be true, I’d rather my recipe book not incorporate a scratch-and-taste option.)
Step 5: Place your recipes in your book according to their assigned categories.
+ + + + + + +
 Now your book is complete and ready for you to use! The best part of having your own recipe book is that it will constantly be evolving to suit your needs. If you find a spaghetti recipe you like more than your current one, replace the old with the new. If you make changes to a recipe, make a note of it right on the printed recipe page. (I will sometimes jot down notes about a change I made that did not work so I remember not to try it again!) Always keep extra sheet protectors at the back of your recipe book so that you can add a new recipe at any time. You never know when a stellar recipe will enter your repertoire, and you’ll want a place to put it!
